You can move a suitable full-size SATA optical drive out of an old PC and into a separately powered USB enclosure, keeping the new case's front panel free of a drive bay. Two options are the Vantec NexStar DX NST-536S3-BK and OWC Mercury Pro. The decisive checks are the old drive's interface, body depth and electrical requirements, followed by the enclosure's power supply, USB connection and the software needed for your discs.
Start with the drive you already own. The NexStar DX lists a maximum optical-drive depth of 185 mm; the current Mercury Pro guide lists 172 mm. Those different limits can decide the choice before enclosure styling or USB labels matter. A complete purchase also includes the correct power adapter and cable, rather than assuming the computer's USB port supplies everything.
Identify the Drive Behind the Front Bezel
Record the optical drive's exact model and inspect its rear connection before choosing an enclosure. Vantec specifies a standard 5.25-inch SATA desktop optical drive. Its FAQ excludes IDE drives and the 9.5 mm or 12.7 mm laptop mechanisms that use Slim SATA. A laptop drive being “SATA” does not make it the standard desktop mechanism this enclosure accepts.
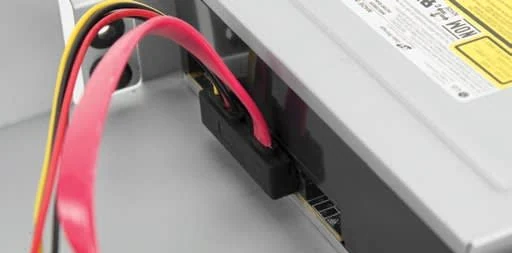
OWC's current guide likewise specifies 5.25-inch SATA optical drives. Its assembly photograph shows separate SATA data and power connections at the mechanism. Use those physical connections to understand the required drive type, then match your particular drive's documentation and rear sockets.
For a simple retention record, write down the model, interface, measured body depth and power requirements printed on the drive label. Keep a photograph of the label with that record. If the old PC's front panel covered the drive, identify the actual mechanism rather than relying on the computer manufacturer's name or the label on its case.
An IDE mechanism or a slim laptop mechanism leaves a specific interface or mounting mismatch for these choices. Do not put an unidentified converter into the budget and assume it makes the whole enclosure suitable. Resolve the correct enclosure type for that drive before buying either kit.
Also decide which functions you need to keep. Reading DVDs, writing particular discs and playing commercial Blu-ray movies are separate requirements. The retained drive and its software determine much of that functionality; a new outer enclosure does not establish it.
Check the NexStar DX Depth Limit and Complete Kit
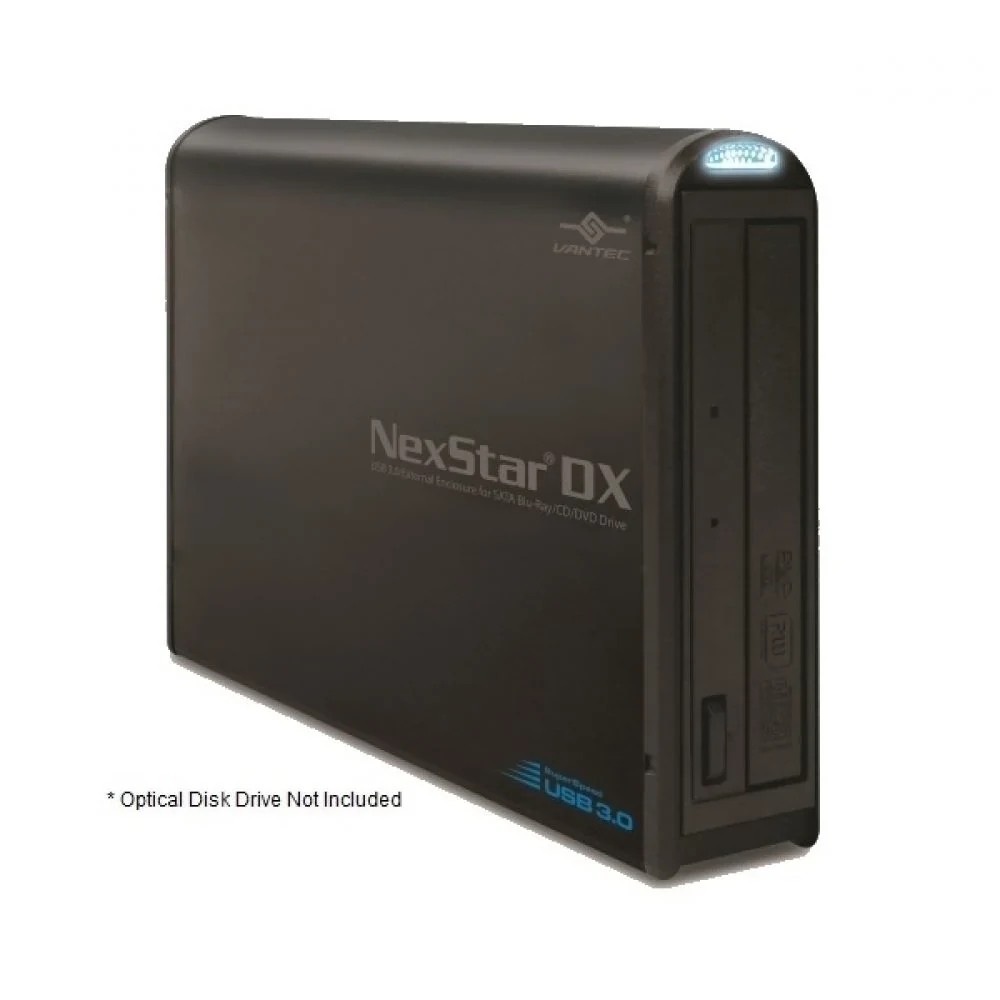
For the NST-536S3-BK, Vantec lists standard SATA internally, USB 3.0 externally and an optical-drive depth limit of 185 mm. Its external dimensions are 252 × 172 × 49 mm. The 172 mm figure in those outer dimensions is not an alternative optical-drive depth allowance.
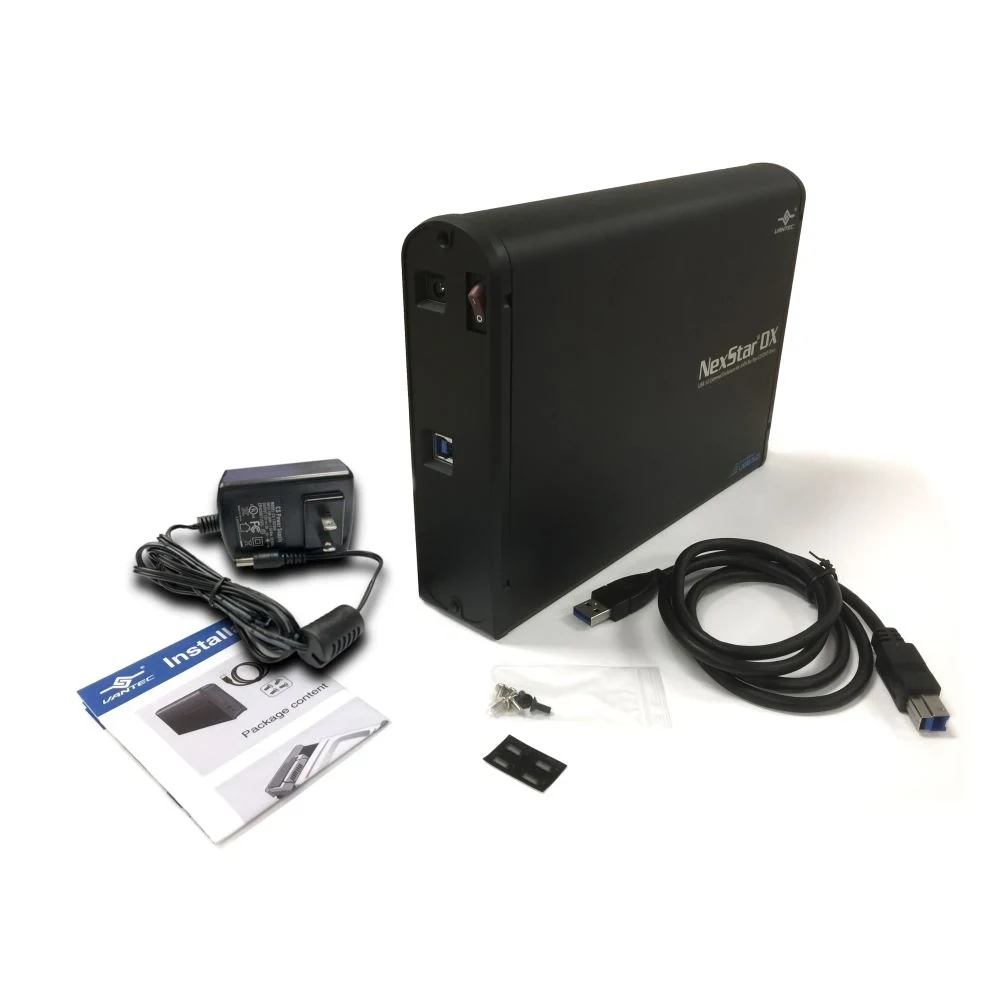
Measure the mechanism itself and compare it with the stated 185 mm limit. For example, a 180 mm standard SATA drive is within that depth window, subject to the remaining mechanical and electrical checks. A 190 mm mechanism exceeds it. An enclosure looking large enough in a product photograph does not change the published limit.
The kit photograph shows the items that make this a desktop USB conversion: the enclosure, external power adapter, USB cable, installation hardware and guide. Vantec's box list includes the NexStar DX enclosure, quick installation guide, USB 3.0 cable, AC adapter and screws. The specified cable is USB Type-A to Type-B, 36 inches/914 mm long, and the supplied adapter is rated 12 V/2 A.
Keep the model number attached to that list. Vantec's shared FAQ also discusses the NexStar DX2, whose supplied adapter it describes differently. Do not substitute a DX2 box description or adapter rating for the NST-536S3-BK you are actually considering.
The original product image states that the optical drive is not included. That fits this retention job: you are buying a housing for an existing compatible mechanism. If a seller instead offers a populated unit, confirm which mechanism it contains and whether replacing it is part of the intended purchase.
Check the Mercury Pro Drive-Depth Limit
OWC's current Mercury Pro assembly guide supports 5.25-inch SATA CD, DVD or Blu-ray mechanisms up to 6.77 inches/17.2 cm deep. Use 172 mm as the relevant drive-depth limit for this guide. Do not substitute a larger limit from an older listing or another enclosure revision without establishing that it applies to the exact unit being supplied.
A hypothetical 170 mm SATA optical drive falls within both products' listed depth windows. A 180 mm drive falls within the NexStar DX's stated depth allowance but exceeds this Mercury Pro guide's limit. That is a useful purchasing distinction even when both mechanisms fit the same nominal 5.25-inch bay in a PC.
Depth is an initial filter, rather than a promise that every other requirement is satisfied. Retain the drive's exact model and power information, check the enclosure's mounting arrangement, and confirm that the front of the mechanism remains usable after installation.
OWC's package list includes the Mercury Pro, a USB Type-A to Type-B cable, a power supply and a screw packet for enclosure-only units. Distinguish that empty enclosure from a complete Mercury Pro sold with a drive already installed. An installed mechanism may be a different model from the one you want to keep.
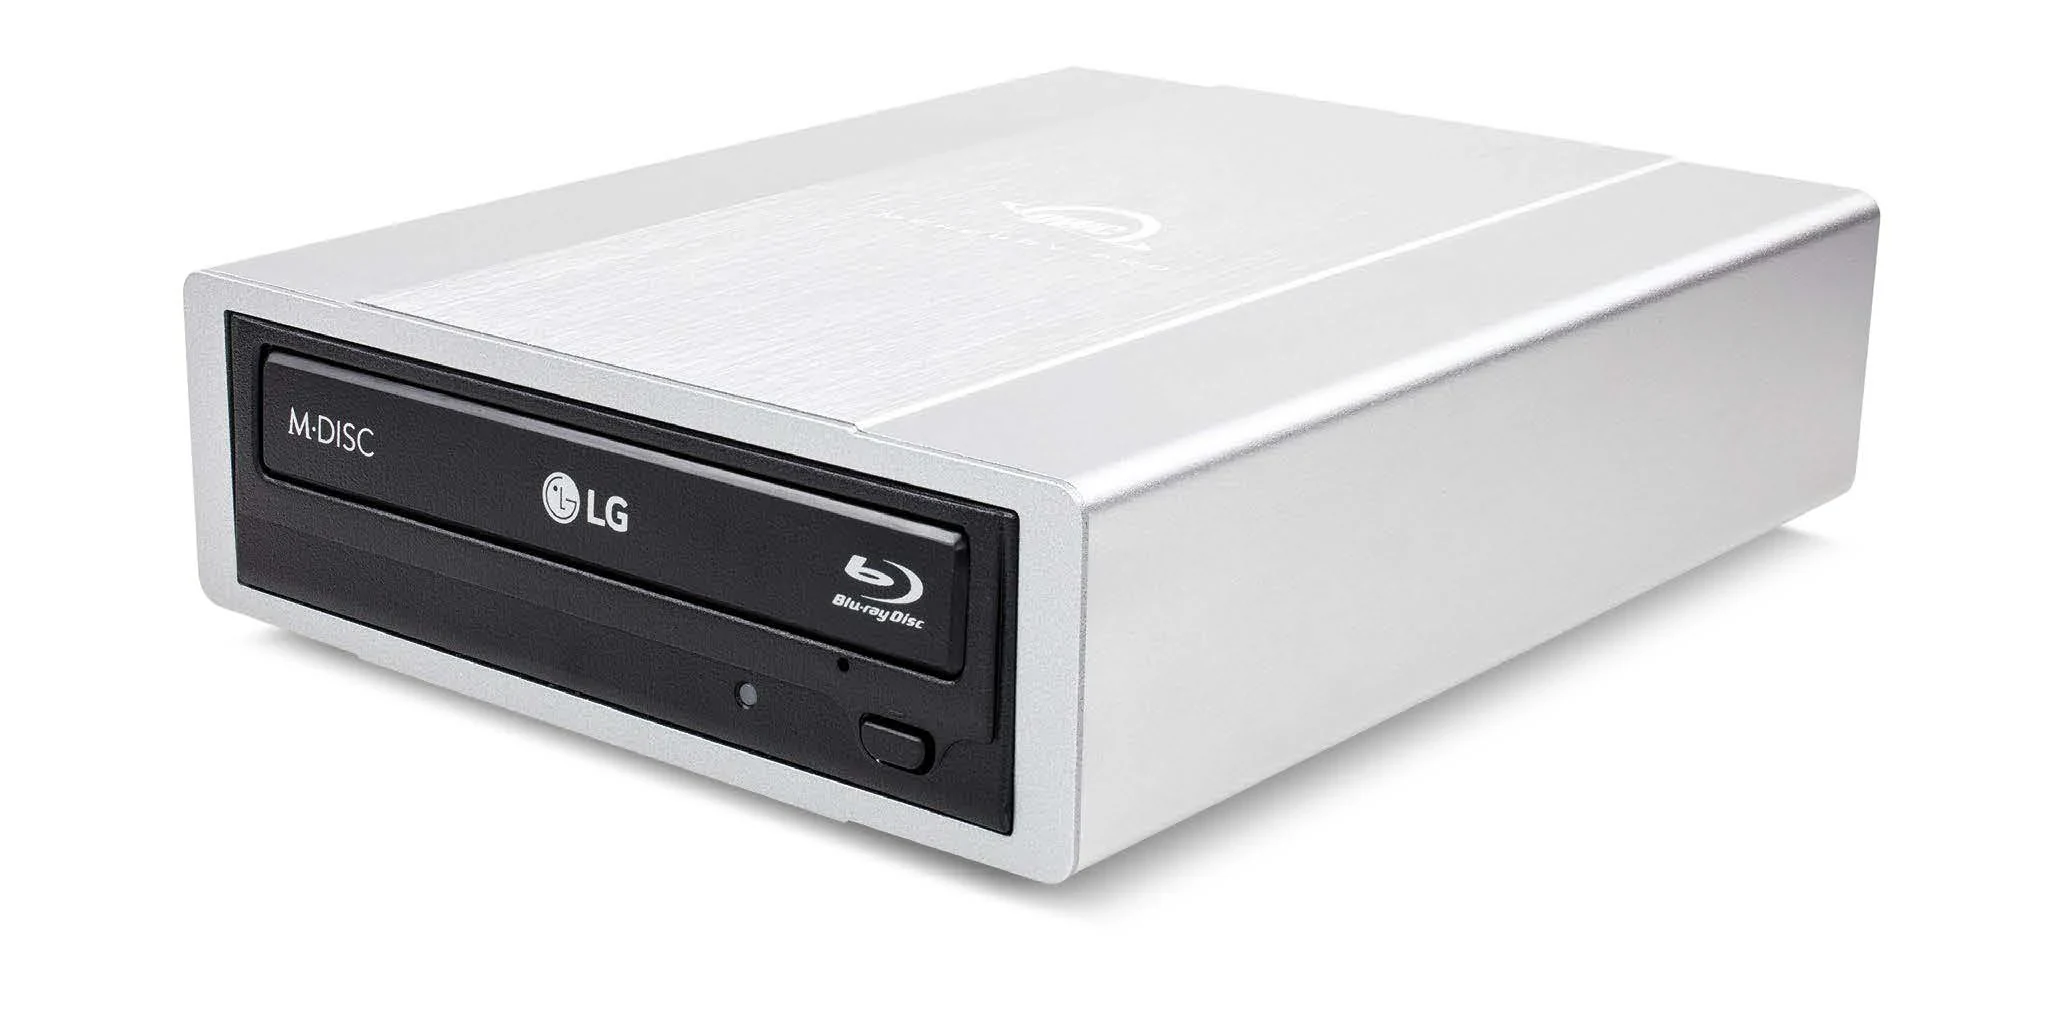
The photographed Mercury Pro example contains an LG mechanism bearing Blu-ray and M-Disc markings. OWC explicitly says that appearance and feature placement vary with the installed drive, and that not every drive supports those media. Treat the photograph as an enclosure-and-mechanism example, not as a feature upgrade for an older DVD-only drive.
| Fit or package check | NexStar DX NST-536S3-BK | Mercury Pro guide covered here |
|---|---|---|
| Intended internal mechanism | Standard 5.25-inch SATA optical drive | 5.25-inch SATA optical drive |
| Listed maximum drive depth | 185 mm | 172 mm |
| Power provision | Included external adapter, specified 12 V/2 A | Included power supply; match the exact unit |
| Included USB connection | USB 3.0 Type-A to Type-B cable, 914 mm | Type-A to Type-B cable |
| Mounting items | Installation screws and quick guide | Screw packet for enclosure-only units; assembly guide |
| Disc capabilities | Depend on retained mechanism and required software | Depend on installed mechanism and required software |
Preserve the Correct Power Supply and USB Connection
Plan an enclosure-to-PC USB connection and a separate connection to mains power. OWC's rear photograph identifies the USB port, DC input, security slot and power switch as distinct items. Its usage instructions call for connecting the power supply and USB cable, then turning on the enclosure.
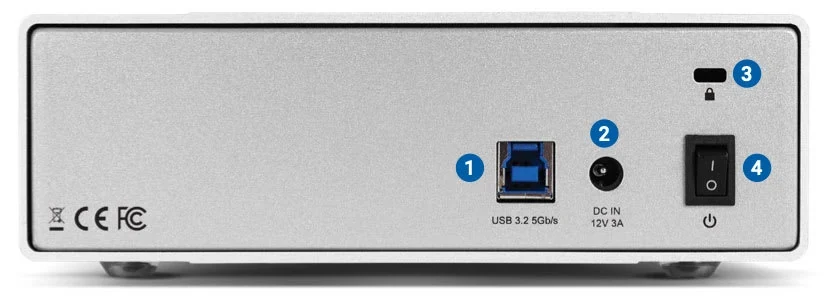
The illustrated Mercury Pro rear panel is marked “DC IN 12V 3A.” That label is useful for identifying the pictured example; verify the label and original supply for the exact unit you own or buy. It is not a reason to assume that Vantec's 12 V/2 A adapter is interchangeable with it.
Vantec warns that a drive may not function correctly if its electrical requirements exceed the supplied adapter's capability. Read the drive label and compare the exact mechanism against the enclosure manufacturer's supported arrangement. If the available information does not establish that match, ask about the drive model rather than treating the external adapter's single current figure as approval for every internal drive requirement.
A missing adapter is a purchasing gap. For a replacement, establish the correct voltage, current capability, connector dimensions and polarity for the enclosure with the manufacturer. Selecting any adapter marked “12 V,” or choosing one because its plug appears to fit, does not complete that match. Keep the original adapter with the enclosure whenever possible.
At the PC end, account for an available port and the supplied cable's actual connector. Vantec recommends USB 3.0. Its FAQ says the enclosure remains at USB 3.0 speed on faster USB 3.1/3.2 connections, and cautions that USB 2.0 may not support writing correctly. A faster port does not change the optical mechanism's own capabilities.
For a USB-C-only computer, Vantec describes an adapter with a USB-A female connection and USB-C male plug. That adapter is an additional item to verify, not part of the stated enclosure box list. Match it to the required data connection; do not count a charging-only accessory as completing the optical-drive path.
Keep Disc Features and Playback Software Attached to the Mechanism
The Mercury Pro front-view photograph shows an eject button and manual eject opening on its example mechanism. It also makes the model-dependent Blu-ray and M-Disc markings visible. Your retained drive may have a different face, button position and media support. Use its exact model's supported formats when deciding what this conversion preserves.
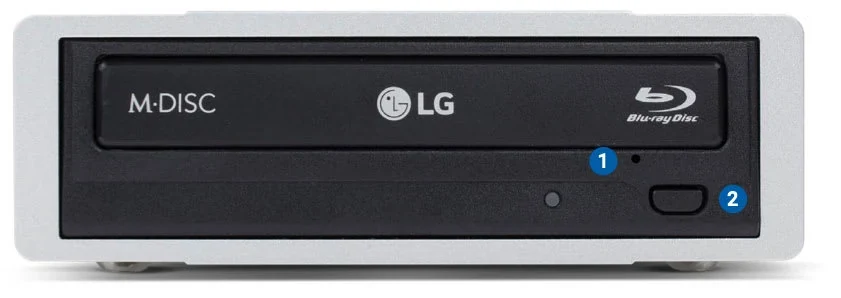
For example, a DVD writer moved into either suitable enclosure remains a DVD writer. Choosing an enclosure advertised for Blu-ray drives does not establish Blu-ray support for that mechanism. Equally, a Blu-ray logo in an example photograph does not prove that every empty enclosure package contains a Blu-ray drive.
Separate computer recognition from the software task you want to perform. Vantec describes its enclosure connection as plug-and-play without an additional enclosure driver, but that does not settle every disc format, writing application or commercial-movie playback requirement. For a planned disc-writing task, confirm the intended media type and writing application on the new operating system.
Vantec's own movie-playback FAQ directs users to the necessary software or player for a Blu-ray movie. If retaining commercial Blu-ray playback is the goal, check the particular drive, new operating system and legitimate playback software or license before purchasing the enclosure. Keep a missing application or usable license in the budget alongside missing physical parts.
For basic operating-system screening, Vantec lists Windows 7, 8, 10 and 11, and Mac OS X 10.6 or later. The OWC guide lists Windows 7 or later, OS X 10.7–10.11.6 and macOS 10.12 or later. These enclosure requirements do not establish that an old third-party playback application supports the replacement computer's system.
Plan the Assembly and First Connection
For an enclosure-only Mercury Pro, the guide describes removing the four bottom screws while keeping their loosely attached rubber feet together, sliding out the inner chassis, and connecting the optical drive's SATA power and data cables. It then describes securing the drive with eight included screws before returning the chassis to the outer housing and refitting the feet and bottom screws.
Those details identify useful items to check in an open-box purchase: the internal connection parts, drive-mounting hardware, bottom screws and feet. Use the instructions for the exact enclosure when installing the drive; the OWC screw arrangement should not be assumed to describe the Vantec housing.
Reserve desktop space for the enclosure, its cables and the disc tray's movement. Position the power outlet and PC connection within reach of the actual cables. Externalizing the drive removes its demand for a front bay in the new case, but creates a separate object and cable route on the desk.
The NexStar DX has a particularly important first-connection condition. Vantec says it can remain in sleep mode when it is not connected to a working computer. Its instructions require the necessary cables to be connected and the computer powered on before switching on the enclosure. A stand-alone power test with no working host connection is therefore not enough to declare it defective.
For the Mercury Pro, connect its supply and USB cable and use the rear power switch as the guide directs. OWC says to unmount and eject the disc before powering the optical drive off. If it is not working properly, its troubleshooting starts with power, the power strip if used, and both USB cable ends, followed by a different cable or computer when needed.
Finish the Retain, Buy and Missing-Item List
Suppose the old drive is a standard SATA mechanism measuring 180 mm deep, and its electrical requirements have been confirmed for the NexStar DX. The Vantec is within its published depth limit; the 172 mm Mercury Pro version is not. The remaining list is the complete Vantec kit, a suitable USB connection, desktop placement and any software needed for the old drive's intended disc functions.
Now suppose a 170 mm SATA drive is being considered for an empty Mercury Pro. Its depth passes the initial filter, but a used enclosure lacking its power supply is still incomplete. Resolve the supply and retained drive's electrical match, check the mounting parts, and carry the old drive's media capabilities into the software decision.
| Item | Retain or buy when | Keep a specific gap when |
|---|---|---|
| Existing optical drive | Its exact interface, dimensions, electrical needs and intended disc functions are established | It is unidentified, too deep or has an unresolved power/interface mismatch |
| Empty enclosure | Its current version fits the actual drive and supplies the needed internal connections | A different revision's limit or a populated example is being assumed |
| Power and mounting parts | Correct supply, screws and enclosure-specific parts are present | Adapter identity or required hardware is missing |
| PC connection | Available data port, correct cable and any verified host adapter are accounted for | The supplied cable cannot yet connect to the new computer |
| Software | Required writing/playback application and license work for the planned system | Disc support or commercial playback is inferred from enclosure branding |
Buy the enclosure that preserves a confirmed, useful mechanism with the fewest unresolved parts. Once the drive, housing, power, USB connection and software requirements are accounted for together, the missing front bay no longer has to decide which PC case you choose.