The MINISFORUM DEG1 can be a way to keep a desktop graphics card and its ATX or SFX power supply when moving to a compatible OCuLink mini PC. The complete setup still needs the dock, its graphics-card holder and fasteners, a suitable OCuLink cable, the PSU's own power leads and AC cord, and the mini PC's separate power adapter. Buying the bare base does not replace those parts.
This route starts with a mini PC that already has an OCuLink connection intended to support an external GPU. Establish that host requirement before pricing the dock. A small PC with USB-C, USB4 or Thunderbolt alone is a different starting point; those connector labels do not provide the DEG1's specified OCuLink link.
Start with the Host Port and the Four-Lane Link
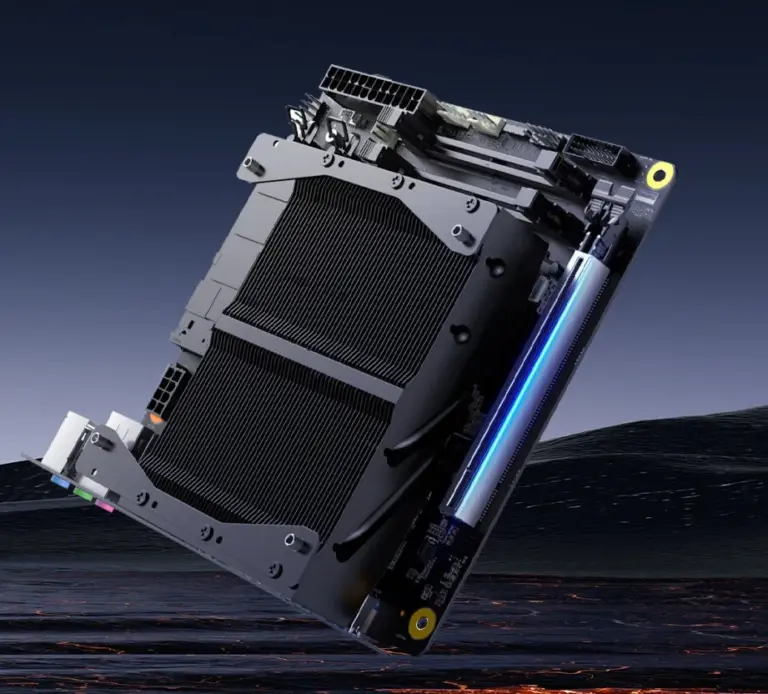
The actual dock-end view helps identify the connection you are planning around. MINISFORUM specifies an OCuLink 4i upstream connection operating as PCIe 4.0 ×4. The graphics-card socket is physically ×16, but its specified connection is also PCIe 4.0 ×4. A full-length slot does not mean the GPU has sixteen lanes back to the host.
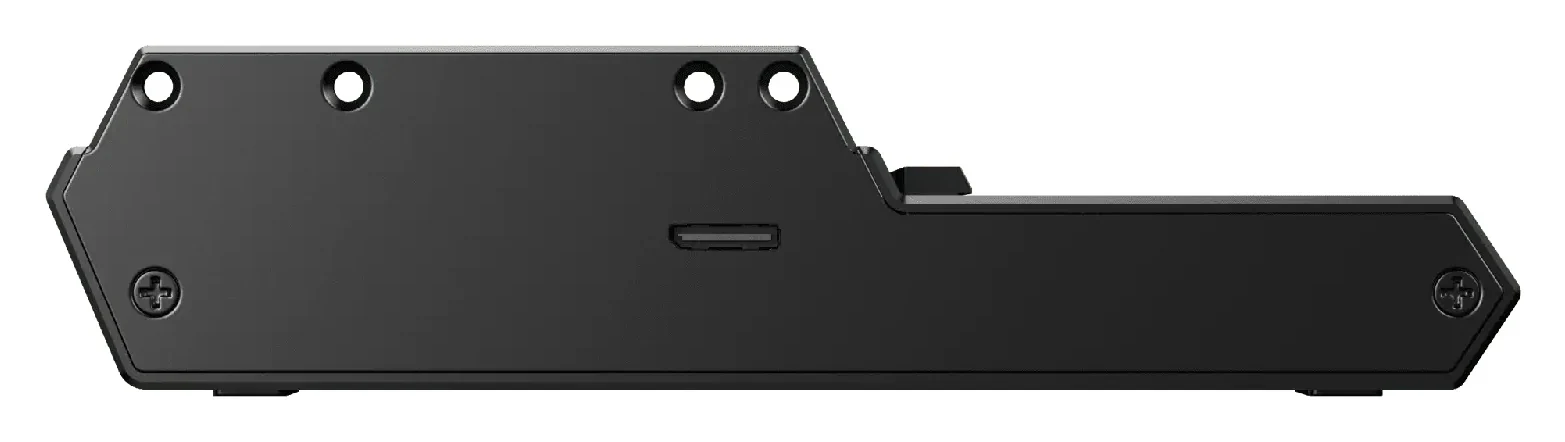
That distinction matters when retaining an expensive graphics card. You are moving it to a different connection arrangement, not reproducing the motherboard slot from the old desktop. The link specification alone cannot tell you the performance of your particular game, display arrangement or application. Do not treat the slot length or a supported GPU family in advertising as a benchmark for the complete system.
Check the exact mini PC model, its OCuLink port purpose and the host manufacturer's external-GPU support. Then confirm the graphics card's support for the intended operating system and driver. A native socket is the first physical requirement, while the exact host and card still need a usable software and startup combination.
Keep the supplied or explicitly approved cable with the dock. The manual warns that an uncertified OCuLink cable can cause malfunction or equipment damage, and prohibits hot-plugging the connection. A used dock without its cable therefore has a specific missing part to resolve. A familiar-looking spare cable or an unrelated USB-C lead does not complete the purchase.
Separate the Dock Kit from the Parts You Supply
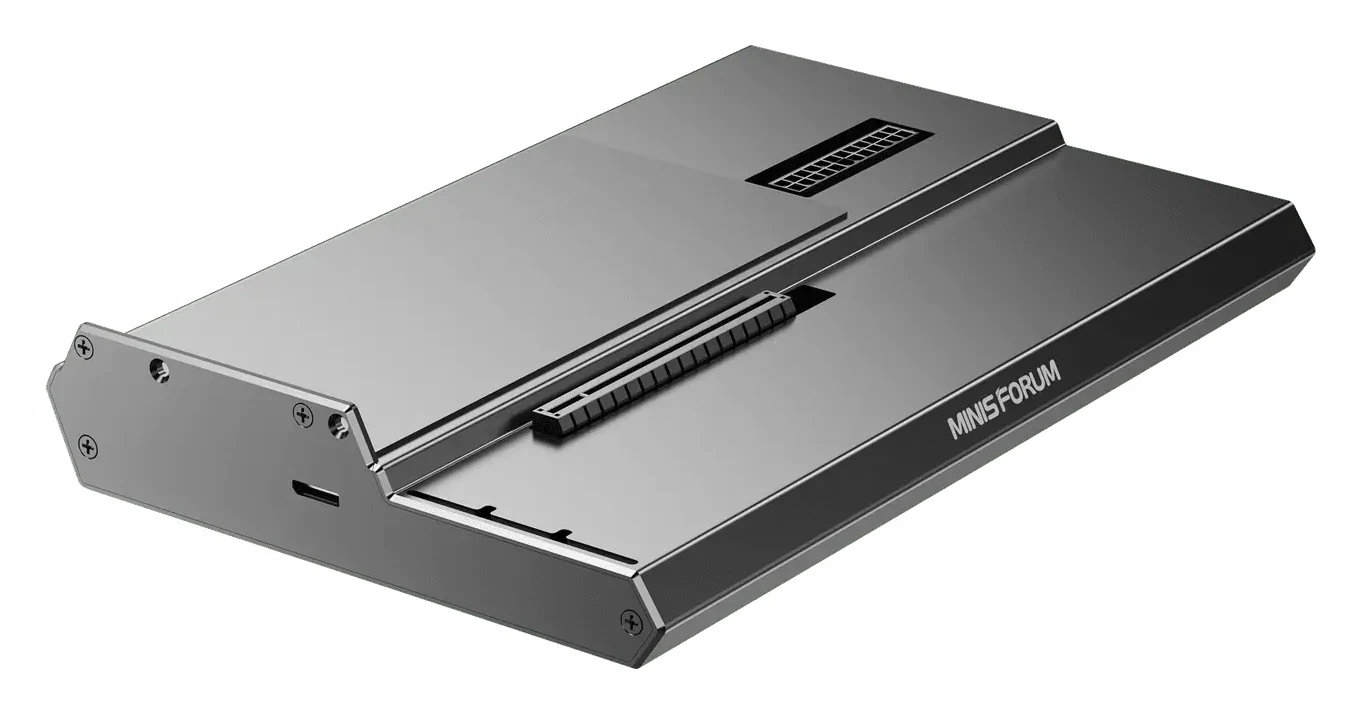
The top view shows the bare base, card slot and board-power connector; the GPU and power supply are separate components. Use the manufacturer's product view to identify the object, then compare the actual box contents with the manual.
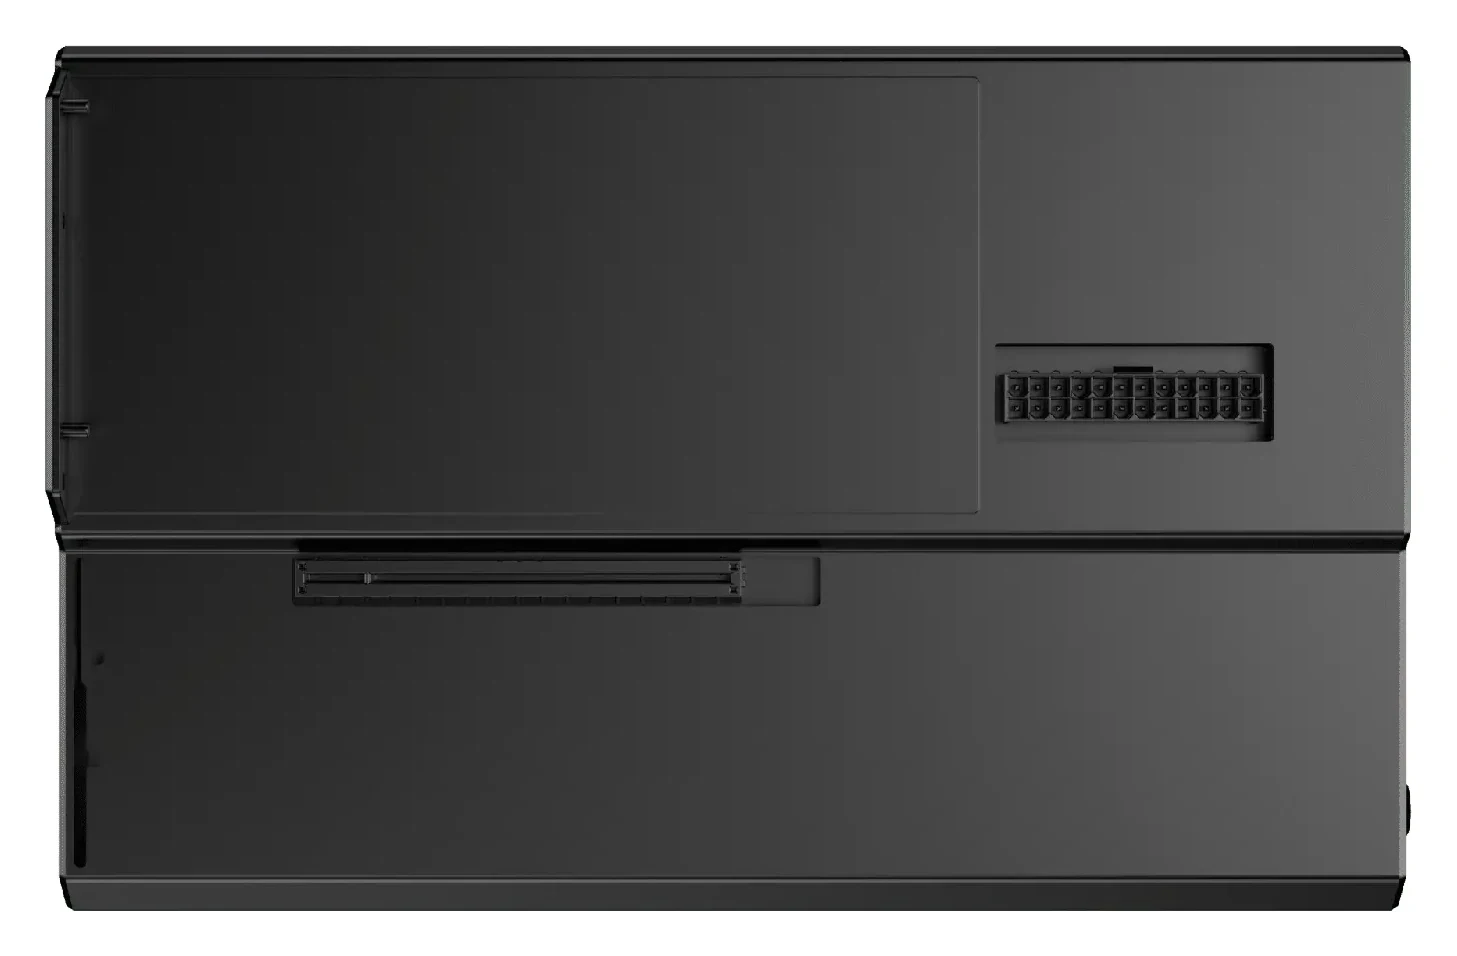
The documented package includes the dock, graphics-card holder, OCuLink cable, installation screw set and user manual. The installation guide separately excludes the mini PC, graphics card, ATX PSU, PSU AC cable, 24-pin cable and GPU 8-pin cable. Those two lists answer different questions and should stay separate.
| Part of the complete setup | Where it comes from |
|---|---|
| DEG1 base, card holder and installation screws | Documented dock kit; verify the actual set |
| Suitable OCuLink cable | Listed in the kit; confirm it is present and appropriate |
| Desktop GPU and its cooling assembly | Your retained graphics card |
| ATX or SFX PSU, matching power leads and AC cord | Your complete retained power supply |
| Compatible mini PC and its adapter | Your host system |
For a secondhand purchase, ask for a photograph of the holder, fasteners and cable beside the base. An empty slot in a clean product image does not establish that these loose pieces are included. The card holder is especially easy to overlook when a seller has removed the graphics card and stored the bracket separately.
Do not budget for an included PSU based on a generic regional-accessory note. The manual's specific installation list says the power supply and its cables must be supplied separately. Confirm the actual regional package and any seller-added bundle in writing rather than allowing one to substitute for the other.
Retain the Complete PSU and Its Own Harnesses
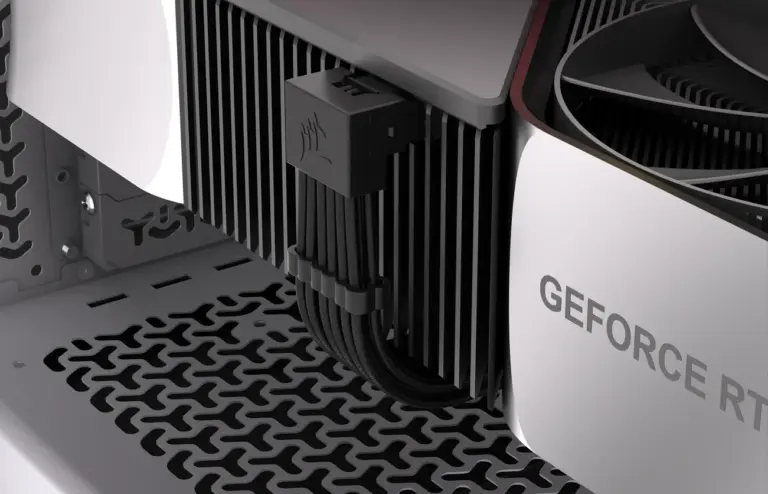
There are two power connections to understand on the GPU side. The PSU's matching main-power lead connects to the dock's 24-pin board-power connector. The graphics card's required auxiliary power leads connect the GPU to that same PSU. Supplying the dock does not automatically supply every connector on the graphics card.
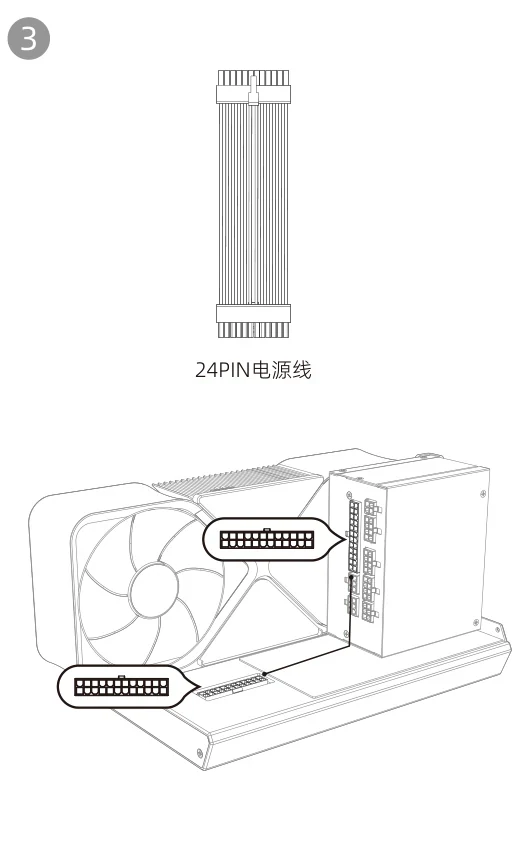
The original 24-pin illustration shows the relationship between PSU and dock. Use the main-power harness made for your exact PSU, including its correct PSU-side arrangement if it is modular. The drawing is not a universal modular connector map. Keep the complete original harness set with the retained PSU instead of borrowing leads from another unit because their ends appear similar.
The manual also illustrates an 8-pin GPU connection. That is a useful example of a separate power path, rather than approval for every card with multiple sockets or a modern 16-pin inlet. Identify the exact card's required connector arrangement and the suitable cables provided or explicitly supported by the PSU manufacturer. CPU/EPS leads are not substitutes for GPU power leads merely because both are described as eight-pin.
Check the PSU model and output capacity against the card's requirements and the dock setup. ATX and SFX describe supported supply formats, not a single wattage. The DEG1 is not a self-contained enclosure with an included, fixed-capacity PSU. A power rating from another MINISFORUM graphics product does not become this dock's rating.
Keeping a supply that previously powered the GPU may simplify the inventory, but it still requires the complete correct harnesses and suitable connections. A PSU separated from its modular cables is a different proposition from the working, fully wired unit in your desktop. Price any confirmed replacement harness before deciding that retention saves money.
Avoid creating a custom power arrangement to rescue an incomplete bundle. If the manufacturer cannot identify suitable missing leads for the exact PSU, keep that part of the plan unresolved. Opening the PSU, modifying its wiring or improvising connector substitutions is beyond a straightforward move into this dock.
Check the PSU Mount and Secure the Graphics Card
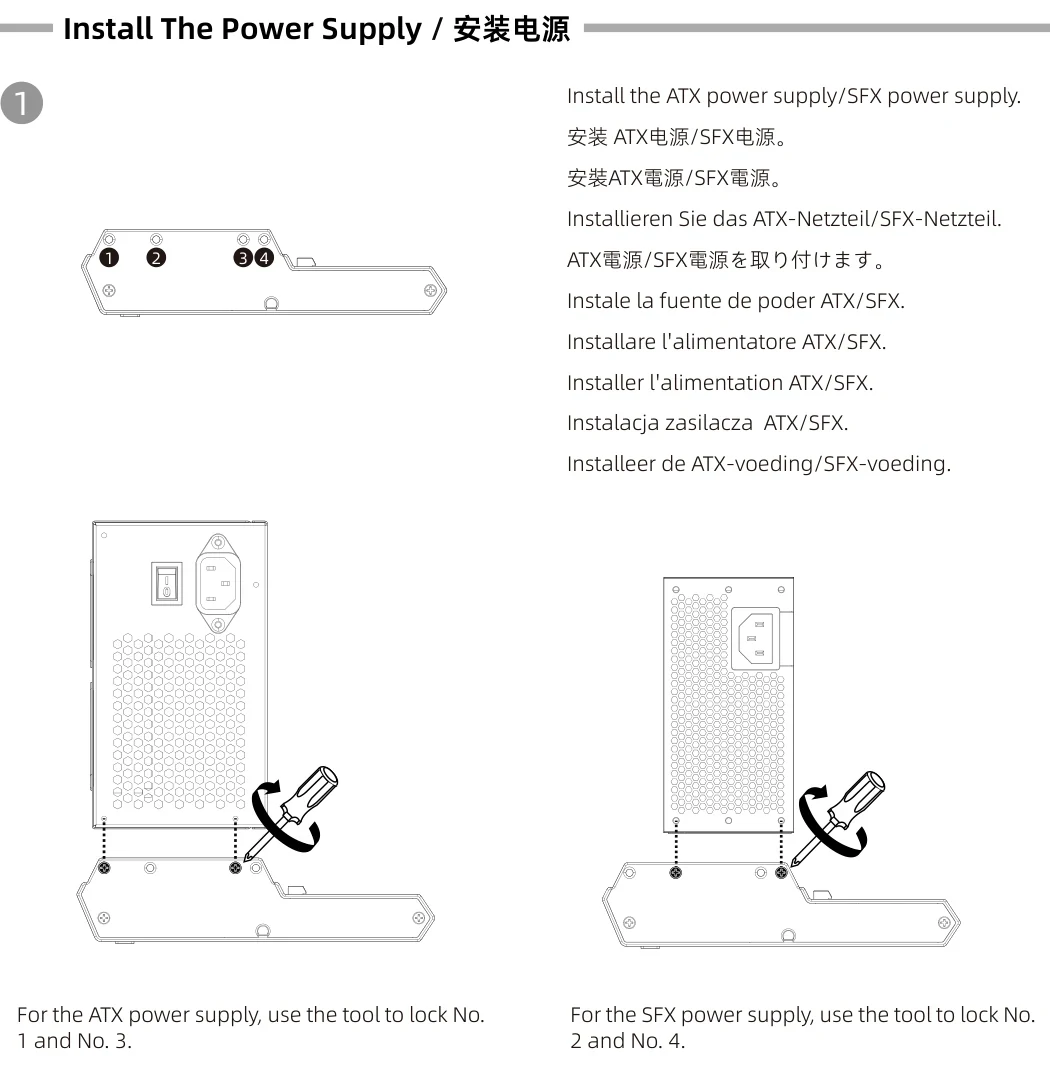
The manufacturer's mounting illustration distinguishes the supported PSU positions: ATX uses holes 1 and 3, while SFX uses holes 2 and 4. Use the supplied mounting arrangement and the appropriate fasteners. Do not assume that a supply resting on the base is mounted simply because its cable reaches the board connector.
The GPU installs vertically into the PCIe socket and is then secured through its card holder. The holder and screws matter because the socket alone is not the whole mechanical installation. Confirm that the card's bracket can meet the holder and that the assembly remains stable with its power and display cables attached.
An open base removes some enclosure walls, but it does not approve every card length, thickness, weight or cooling arrangement. Check the exact GPU, its bracket, the PSU body and cable exits together. A large cooler, a projecting backplate or a card with its own radiator changes the finished arrangement. Obtain exact fit confirmation rather than inferring unrestricted support from the absence of a case roof.
Preserve the GPU's own cooler and provide clear airflow around its fans and heatsink. Also leave the PSU's ventilation and switch accessible. Plan the assembly's desk position with the cables connected; pulling a short display lead taut can put strain on hardware that looked stable before the monitor was connected.
The original product view is a useful reference for its shape and mounting edges. It is not evidence that an unidentified heavy card or unusually long PSU has been tested on it. The right retained parts are the ones you can both connect and secure in the finished layout.
Plan Two Separate AC Power Paths
The original connection drawing shows a power adapter for the mini PC and a separate AC connection for the desktop PSU. Keep both in the inventory. The OCuLink lead links the host and graphics-card dock; it does not replace the mini PC's adapter as a USB-C charging dock might.
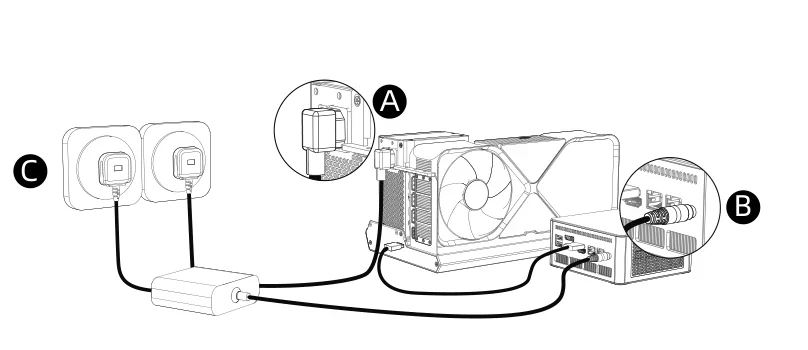
This is easy to miss when downsizing from a tower. The old desktop had one PSU inside its case. The new arrangement has a small host with its own adapter, plus an external GPU assembly with the retained PSU. You can reduce the host's enclosure size while still needing space and mains connections for those other pieces.
Route the OCuLink lead so it reaches without being stretched or becoming a handle for moving the dock. Keep the GPU's power leads clear of its fans and leave access to the PSU AC inlet and switch. Check the complete layout before deciding where the mini PC, dock and monitor will sit.
Make the hardware connections while the equipment is powered down and disconnected from mains. The manual's installation sequence covers the PSU mount, GPU insertion, 24-pin dock connection, card holder and GPU auxiliary power before linking the host. It then addresses the AC connections and power switch. Follow the original sequence for the actual kit rather than treating a powered dock as a place to insert or remove cards.
For later changes, shut the host down normally and power down the equipment before changing the OCuLink connection or hardware. MINISFORUM explicitly warns against hot-plugging and forced power interruption. A cable that is convenient to reach is not an invitation to disconnect it while the PC is running.
Confirm the Startup Behaviour for Your Mini PC
The DEG1 specification includes a ForcePowerOn button with an LED. That button has a practical purpose: startup behaviour can depend on the host. The manual shows a host-start sequence in which the graphics dock activates with the mini PC, but then gives a separate instruction for other manufacturers' systems.
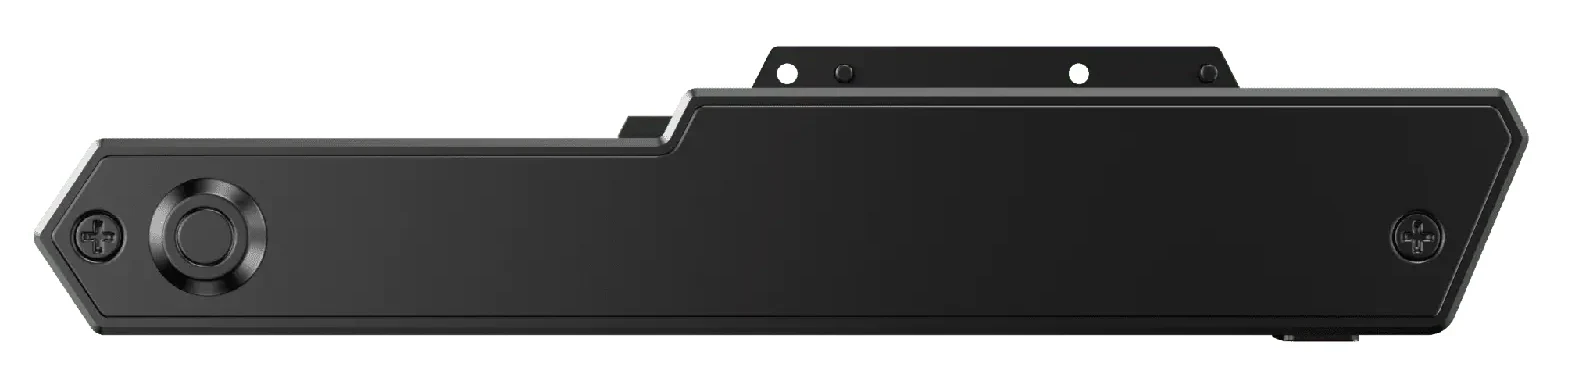
For a non-MINISFORUM mini PC that does not support the follow-start function, the manual says to activate the graphics dock's power button first, then turn on the host. If your host needs this sequence, plan for both controls to remain accessible. It does not establish automatic power control for every computer carrying an OCuLink socket.
Check the intended startup arrangement for the exact mini PC and cable before buying. Even a MINISFORUM model should be identified precisely rather than approved solely by the brand name. You need confirmation that the host's port and supported external-GPU arrangement match the dock and intended graphics card.
After assembly, the useful first checks are whether the GPU is detected with a supported driver, the display works through the intended output, and the documented startup sequence works consistently. A lit button or a spinning graphics-card fan establishes only part of that chain. Neither proves that the operating system has a working graphics connection.
If detection fails, preserve the exact model, cable, power and startup details for the manufacturers' support teams. Do not compensate by hot-plugging the lead, forcing repeated power cuts or copying an unrelated mini PC's firmware settings. An unresolved compatibility issue is a reason to hold the migration, not proof that another cable-shaped object will solve it.
Keep Display and Peripheral Connections in the Plan
Use the graphics card's suitable video outputs for the intended monitor connection. Check the display cable and connector access with the card secured on the dock. The old cable may be reusable, but its length and direction now matter because the card is outside the host rather than behind the tower's rear panel.
The documented DEG1 arrangement provides the graphics link and its power connections. It does not provide a general USB hub, network dock or combined headset interface to replace your existing desktop connections. Keep the keyboard, storage, networking and audio connections planned around the mini PC or their existing suitable equipment.
This is especially relevant if you are comparing it with a USB4 dock you already use. A cable carrying the external GPU connection does not automatically retain the charging, USB peripherals and audio features of another kind of dock. List the functions you actually rely on, then identify where each one connects in the new layout.
Allow room to use the setup comfortably as well as to assemble it. The mini PC, separate adapter, GPU, PSU and cable paths form the finished footprint. Compare that whole arrangement with keeping the existing tower, particularly when the desk has limited protected space for exposed hardware.
Decide Whether Your Retained Parts Form a Complete System
For example, suppose you already have a mini PC with confirmed native OCuLink external-GPU support, a compatible desktop card and its correctly rated ATX PSU with all original leads. A complete DEG1 kit can supply the base, holder, fasteners and link cable. Your remaining tasks are exact mechanical fit, correct power connections, supported drivers and the documented startup arrangement. That is a plausible retention plan.
Now consider a different inventory: a USB-C-only mini PC, a loose GPU, a modular PSU without identified cables and a used base missing its holder. Buying the base alone leaves several essential dependencies unresolved. The attractive dock price does not turn those objects into the first example's complete setup.
Before dismantling the old working desktop, record what will stay, what must move with it and what is still missing. Keep the GPU with its cooler and bracket, the PSU with its own complete harness set and AC cord, and the host with its adapter. Verify the dock's holder, fasteners and certified link cable separately. Resolve the exact host/card compatibility before turning the old system into spare parts.
The purchase makes most sense when the costly retained GPU and PSU remain useful together and the remaining kit can be identified precisely. If completing the setup requires another host, uncertain power wiring or unsupported mechanical changes, reconsider the migration cost before committing to the open dock.