Choose a 90-degree GPU power cable in this order: verify its PSU-side termination, select the GPU-side bend using the latch position, and check whether the rigid elbow can fully enter your card's socket without hitting the cooler, backplate, or PCB. A correct electrical family and a convenient bend direction still do not solve a deeply recessed GPU connector.
CORSAIR's 12V-2×6 angled cable family offers three PSU-side terminations, each with Style A and Style B GPU ends. That produces six variants, but the decisions are easier when you treat them as two separate choices followed by one mechanical check.
Start with the Exact PSU Model
Record the PSU's full model and revision, then determine which cable type its manufacturer supports. The choices in this CORSAIR family are Type 4, Type 5, and a native 12V-2×6 termination. Type 4 and Type 5 are PSU cable families; they are not interchangeable labels for the GPU connector.
Use a Type 4 cable only with a documented compatible CORSAIR Type 4 PSU, and a Type 5 cable only with a documented compatible Type 5 PSU. Do not infer compatibility from modular socket appearance or from an old cable that seems to fit. If the model's cable family is unclear, resolve it before ordering.
The native 12V-2×6-to-12V-2×6 variant is the separate route CORSAIR describes for a PSU with that native port. Confirm the PSU documentation and the selected cable's rating and intended use. “Modular PSU” on its own is insufficient information to select any of these three options.
Use the Latch to Identify Style a and Style B
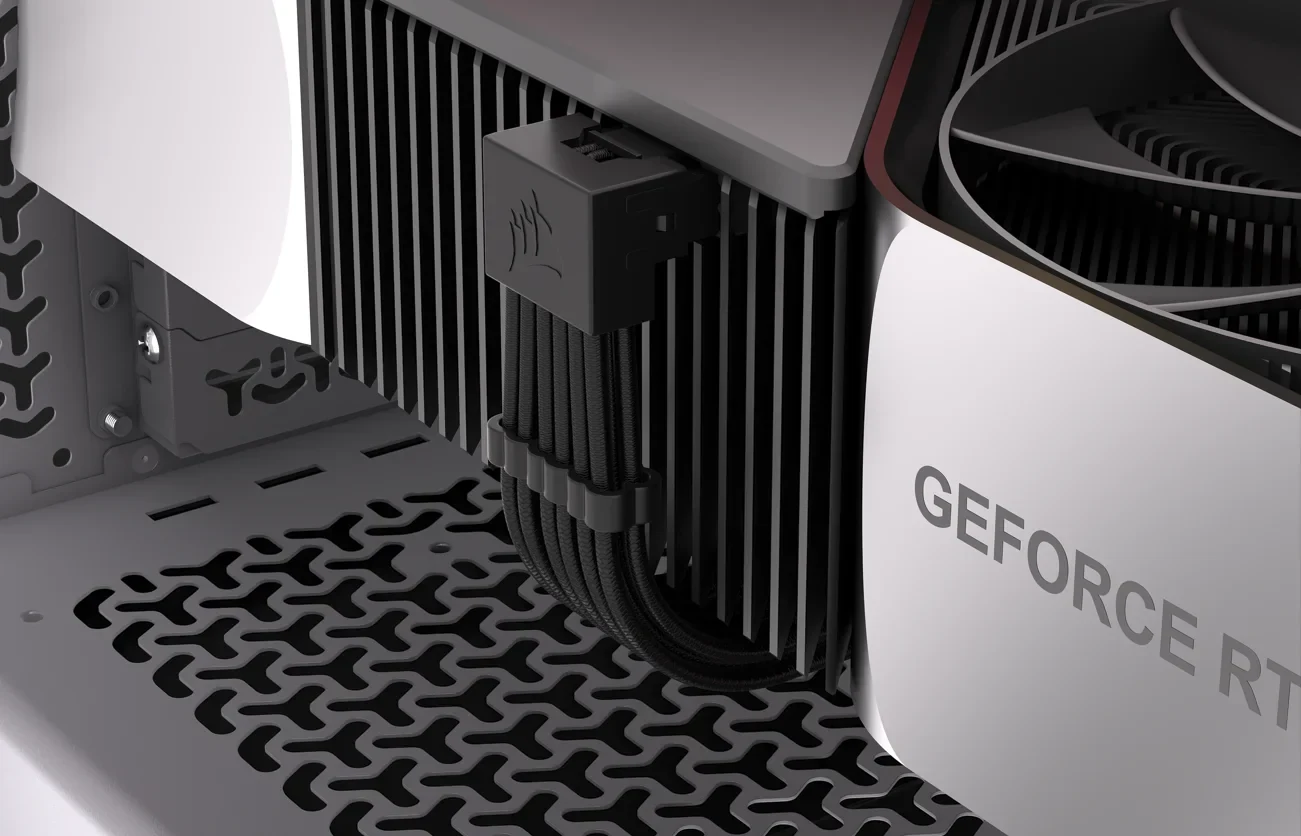
CORSAIR defines Style A as having the retaining clip on the outside of the 90-degree bend, and Style B as having it on the inside. Those definitions stay useful when the GPU is rotated. Descriptions such as “upward” and “downward” depend on the socket's orientation and how the card is mounted.
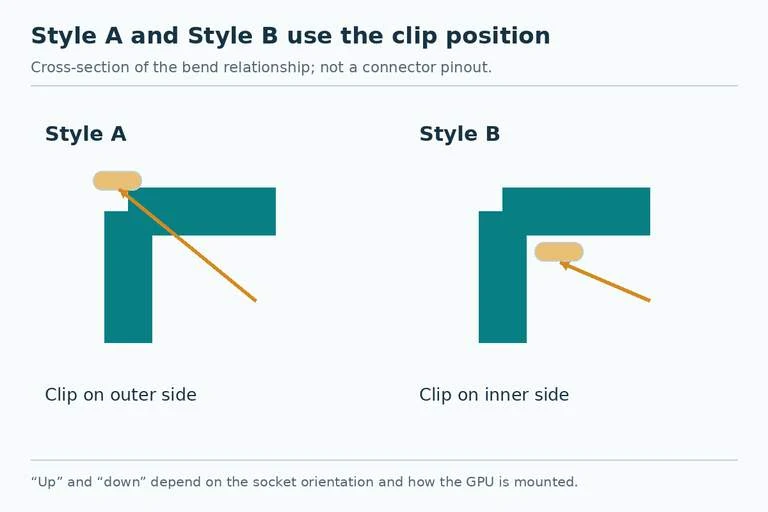
Examine the latch feature on the card's power socket. Decide where the cable should travel in the completed build, then compare the selected cable's product drawing with that orientation. Use the same viewing direction when comparing the card and drawing; mentally flipping one image can reverse the apparent answer.
If you plan to mount the card vertically later, evaluate that final orientation too. The preferred route around the backplate or fan side may change. Style A is not universally the backplate route, and Style B is not universally the fan-side route.
Build the Six-option Shortlist
| PSU-side requirement | Style A | Style B |
|---|---|---|
| Documented CORSAIR Type 4 compatibility | Type 4, clip outside bend | Type 4, clip inside bend |
| Documented CORSAIR Type 5 compatibility | Type 5, clip outside bend | Type 5, clip inside bend |
| Supported native 12V-2×6 PSU connection | Native, clip outside bend | Native, clip inside bend |
Choose the row from the PSU documentation and the column from the card's actual socket and desired route. Then verify the SKU in the cart. Similar product images can make the wrong termination or style look plausible until the cable arrives.
This family is described as 600mm long. Use 600mm for the route calculation: that is approximately 23.6 inches. Measure the intended routed path from the PSU connection to the GPU, including the way around the shroud and other components, rather than measuring a straight line through the case.
Check the Recessed Socket Before Buying
The wires can flex; the molded connector cannot. On some cards, the 12V-2×6 socket sits below the edge of the cooler or backplate. A tight elbow can hit that surrounding structure before the plug reaches its fully seated position. Selecting the opposite bend may move the obstruction, but it is not guaranteed to remove it.
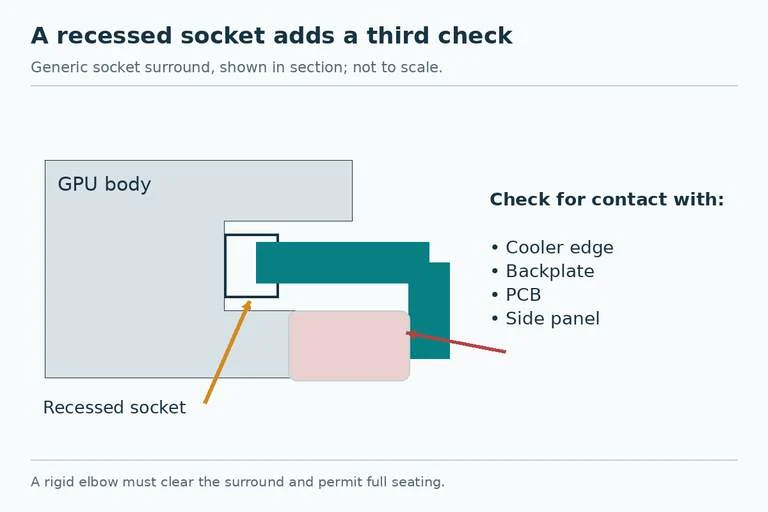
Inspect the exact graphics card model, including its cooler and backplate, rather than relying on the GPU chip name. Look for a dimensioned cable drawing or a documented compatibility answer for the combination. Compare the elbow's occupied space with the socket recess and the proposed exit path.
For example, suppose the cable needs to turn toward the backplate, but a raised backplate edge occupies that corner beside the socket. Even a latch orientation that looks correct cannot establish fit. Keep the angled cable off the order until the rigid body can clear the obstruction. Do not plan to bend the connector housing or use the case panel to hold it in place.
Also check the panel's closing path. A right-angle cable reduces one projection from the card but creates occupied space alongside it. That space can conflict with another component or with the recess around the port.
Finish the Purchase and Installation Checks
Before payment, your list should identify the exact PSU, confirmed cable family, GPU model, Style A or B, socket-clearance evidence, and the routed length. If one item is uncertain, identify that specific gap rather than buying a cable described only as a “universal 90-degree GPU lead.”
Follow the PSU and GPU instructions with power disconnected. Confirm the connector seats fully and its latch engages without pressure from surrounding parts. If the rigid elbow collides before seating, stop and change the cable arrangement. Recheck the connection after cable management, then close the panel only when it clears the cable normally.
The best angled cable is the variant that satisfies all three checks together: the PSU connection is correct, the latch places the bend where you need it, and the card's socket surround leaves room for a complete connection.